This is a blog of my adventures in the kitchen. I always like to try new things, and I'm looking up different recipes constantly. Some recipes on here will be my own, some will be found recipes. Some will work, some won't. Trial and error, right? I'm no professional and I don't claim to be, I just enjoy cooking. :)
Showing posts with label Sides and Snacks. Show all posts

Thursday, July 12, 2012

Coconut Russian Tea Cakes

Whether you call them Russian Tea Cakes, Mexican Wedding Cakes, Bon Bons, or something else, the fact remains that these things are amazing -- IMHO...   Growing up I could count on my grandma always having these for me at Christmas time, eventually she gave me the recipe.  This is not her recipe.  Yes, even I keep SOME secrets.  ;)  The recipe given to me is for the original flavor ones, with nuts in them.  This a a recipe I found online.  Pretty similar, actually, but this one doesn't have nuts and it has coconut instead.

The dough itself isn't super sweet, it's still delicious, just not super sweet.  What makes these little guys amazing is the yummy, sugary coating around them.  They completely melt in your mouth.  So *bleep*ing amazing.  Be careful, these are basically pure butter.  So yum, but so not good for you...  lol.

Okay, so the recipe I have I found on the Martha Stewart site.  Yep, good ol' Martha Stewart.  ;)  Love her or hate her, she does have some yummy recipes.  Bad ones, too, but this one is one of the good ones...

Coconut Russian Tea Cakes

What you'll need:

2 sticks unsalted butter, softened
1/4 C powdered sugar, plus more for dusting
2 C all purpose flour
1/4 tsp salt (I would probably omit if you used salted butter instead)
2 C sweetened flaked coconut

Preheat oven to 350F.

Cream butter with 1/4 C powdered sugar until fluffy.  Mix in flour and salt until just combined. Stir in coconut.

Roll dough into 1-inch balls. (I measured them at 1 tablespoon each).  Place on baking sheet. Bake until just starting to brown, 15-20 minutes. (Don't over bake)

Roll in remaining powdered sugar, while still hot/warm.  (This is what gives them that yummy coating.  the sugar will melt a bit and stick to the cookies.  So yum!)

Let cool completely, unless you're like me and just have to eat one.  Just know they're messier eaten warm. :P

Sunday, July 8, 2012

Stroopwafels

These are delicious. I've made myself sick eating them. :)

These yummy little things were originally made in the 1700's in the Netherlands. They basically translate as "syrup waffles". They're a bread type waffle with a caramel like cinnamon filling inside. YUM! I was supposed to cut them into perfect circles, but I just couldn't bring myself to waste any of their yumminess. lol.   Traditionally, or so I've read, these are served over your morning cup of coffee or tea, to warm them up a bit.  Personally, I liked them better cold. :)

I first saw these in an Etsy shop, and just had to find out how to make them. Eventually, I bought a pizelle iron, since you have to have a way to make extremely thin waffles. I purchased the iron MONTHS ago, and have been extremely frightened of making these -- the reason being, I hate to admit, is that I seriously SUCK at candy making, and these have a candy filling that has to be made. I've been so worried that I'd go through all of the work of making the waffles just to ruin it with a bad filling. After worrying, I decided for my first time making them I would be safer to just buy caramels, so that's what I did. Yes! I admit it! I did not entirely make the filling!! *sigh* I did add a few ingredients while melting the caramels, though. They still turned out delicious, even if they weren't 100% authentic. Now that I kind of have a "feel" for the whole stroopwafel making process, I'll attempt the real filling next time. ;)

I actually found the recipe online. There are many recipes out there, but this one had good reviews so I went with it.


Stroopwafels

For the Waffles:

4 C all-purpose flour
1/2 tsp ground cinnamon
1/2 C sugar
1 C unsalted butter
2 large eggs
1 package (or 2 1/4 tsp) active dry yeast
1/2 C warm water

To make waffles:
Dissolve the yeast in the warm water.  Cut butter into the flour.  Add the sugar, cinnamon, eggs, and yeast mixture.  Mix well and set aside to rise for 30 to 60 minutes.  (Mine did NOT rise.)

For the filling:
1 1/2 C packed brown sugar
1 C unsalted butter
1 tsp ground cinnamon
6 Tbsp dark corn syrup

To make filling (this is the sauce I did NOT want to make, so I didn't.  Recipe for what I made follows.)
In a saucepan, boil all of the ingredients until it reaches the soft ball stage (234-240F), stirring constantly.

For the filling *I* made!:
1 package caramel cubes, unwrapped
1/4 C cream (total guess on measurement, I just poured some in)
1 tsp ground cinnamon

Melt together in a saucepan. :)  Easy peasy!  

To assemble:
Preheat pizzelle iron.

Roll dough into 12 small balls. (They were too big for my pizzelle press, and just squeezed out the sides. I ended up making 24 instead.)

Squeeze each ball into the press and bake for about 30 seconds. (I went between 20 and 25.)

Slice the waffles into two thin waffles and spread with filling.  (HOT HOT HOT!!!  I used a paper towel to hold the waffles while I sliced them.)

Spread with filling to "glue" slices back together.


From start to finish, this took me nearly two hours.  Yeah, really...  This would be much easier with a partner.  One person to cook and slice the waffles, another to spread filling.

The recipe sounds much more difficult than it really is, especially if you cheat on the filling. haha.  Despite the screaming and swearing coming from the kitchen, I really did enjoy making them.

The next recipe I want to attempt with my pizzelle press would be...

*drum roll*

Cannoli!!!  YUM!!   It's no wonder I have such a "curvy" figure...  ;)

Friday, June 15, 2012

Gyoza - Japanese Potstickers

Yes! I know I haven't posted in AGES!  My husband has been out of town for the past month, and I don't do much extravagant cooking when he's away.  Just basic stuff that I've made a million times, most of which I've already posted.


Please disregard my complete lack of talent in the "food photography" department.  


For some reason, one night last month, I had a craving for Gyoza!  I LOVE these, hubby doesn't.  I realize they're an appetizer, but I paired them with some rice and called it a meal.  Yep...  I totally did.  I get to break the rules when I'm home alone.

Anyway!  Living in a small, SMALL town puts limits on what might be available at the local grocery store.  Needless to say, gyoza wrappers are one of those limitations.  The store usually has wonton wrappers, so I had planned to substitute them instead, but of course! The day I decide to make something fun, they are sold out.  I had to use egg roll wrappers instead.  I did cut them into circles, but they still made VERY LARGE gyoza.

This being my first time ever making these, I don't think I did too bad. :P Are they as cute as the ones you'd get at a Japanese restaurant?  Uhmmm... no... but, I was still pretty proud of myself.

I got this recipe online, the link will be included in the title, as usual. :)


Gyoza - Japanese Potstickers


1/2 pound ground pork (1 cup)
3/4 cup shredded Napa cabbage
1 green onion, diced
2 teaspoons minced ginger
1 egg, lightly beaten
1 tablespoon soy sauce
1/4 teaspoon hot chili oil, or to taste
1/4 teaspoon sesame oil
2 tablespoons vegetable oil for frying, or as needed
30 gyoza wrappers, or as needed

Bring a pot of salted water to a boil. Blanch the shredded cabbage until it is tender but still crisp. Plunge into ice cold water, remove, and drain thoroughly.

In a medium bowl, combine the ground pork, cooked cabbage, green onion, minced ginger, egg, soy sauce, chili oil and sesame oil.

Lay a gyoza wrapper in front of you. Wet all the edges with water. Place a teaspoon of filling in the middle of the wrapper. Fold the sides up to form a semicircle, and then pinch the edges to seal. Continue with the rest of the gyoza wrappers until the filling is gone.

To cook, heat 1 tablespoon oil in a heavy frying pan over medium-high to high heat. Add 12 - 15 of the gyoza and cook for 2 minutes, or until golden brown on the bottom.

Add 1/2 cup of water to the pan. Cover the dumplings and cook until the water is absorbed (5 to 7 minutes). Repeat with the remainder of the gyoza dumplings.


So, that's that... I ate mine with teriyaki sauce, shhh... don't tell anyone, but gyoza sauce is quite simple to make! Just search gyoza sauce online and you'll find plenty to choose from! :)

Tuesday, May 1, 2012

Mini Cupcakes


Okay, so this definitely doesn't fall into a "healthy" category, but everyone needs to splurge once in awhile, right?

A best friend of mine is having a grand opening for her clothing store this week and asked that I make mini cupcakes for it. Not wanting to make TOO many, I decided to make four flavors using only two batches of batter. You could actually get all four of these flavors with just one batch of vanilla batter, if you didn't want too many, by just adding cocoa to the batter for the chocolate ones. The two batches I made still baked around 200 cupcakes.

I figured I'd share how to make these, but it's pretty basic. It's just taking regular cake batter and regular buttercream and adding a few extra ingredients.

For all four of these recipes I used my basic buttercream recipe:

1 cup softened butter
1 lb powdered sugar
1 tsp vanilla
and enough water or milk to give you the consistency you want

Beat the butter and vanilla together, then slowly add the powdered sugar. Then VERY SLOWLY add the liquid to desired thickness.

Now, let me tell you how to bake these little cuties, and then I'll get on with the ingredients. Since these are smaller than regular cupcakes there are a few adjustments you'll want to make. You're going to want to lower the oven temperature by about 20 - 30 degrees F. I baked mine at 320F. You'll also want to cut the baking time by about half. The chocolate and coconut cupcakes took about 8 minutes to bake and the lemon took around 10. Other than that it's just like baking any cupcakes.

First, Death by Chocolate.

This is a chocolate cupcake with a sinful chocolate buttercream. Just use your favorite chocolate cake recipe, or even box mix. Make your cupcakes as directed above and let them cool -- takes no time at all.

For the frosting make the buttercream above and to that add about 1/4 to 1/2 cup melted semi-sweet, bittersweet or dark chocolate chips. Mix it up and ice the cakes! :) Mmmm mmm!!!

Island Paradise

This is my absolute favorite flavor combination. It's a coconut cake with a pineapple frosting. Make your favorite white or vanilla cake batter. To that add a good heap of coconut and some coconut extract, tasting for desired "coconutiness" (technical term).

Bake and cool.

For the frosting you'll again use the basic buttercream, but add a couple spoonfuls of crushed pineapple. This will thin down the frosting quite a bit, so just add more powdered sugar to your desired consistency.

Cherry Lemonade


Again, start with vanilla or white batter.  Add an extra 1/4 cup flour and the zest AND juice of one lemon.

Bake and cool.

For the frosting, start with buttercream - of course.  Chop up a handful of maraschino cherries and add that plus some of the cherry juice to the frosting.  Mix up and add more juice or powdered sugar until desired consistency. (I'm sounding a bit redundant, eh)

Peanut Butter Cup

For this, I had wished I had some of those cute mini Reese's PB cups to put on top, but... I did not.

Start with chocolate batter and bake the cupcakes.  Easy, eh?

Now the frosting on this one is just a LITTLE different than the others.  Make the buttercream above, but cut the butter in half and add 1/2 to 3/4 cup peanut butter.  Mix it up and DONE!  :)

As far as flavors go, the sky is the limit. Play around with it and come up with your favorite. :)

So, next time you're hosting a get together, think about these. They're pretty quick, fairly easy and quite cheap to make. :) And, c'mon, who DOESN'T love cupcakes?! :)

Sunday, April 15, 2012

Steak Fries


This was served right along with the collard greens from the previous post. My husband's favorite meal is BBQ steak (rib eye, of course), steak fries and collard greens. This is the way I do my steak fries. Feel free to change the seasonings however you'd like. :)

You'll be surprised at how simple this really is.

Things you'll need:

Potatoes, any type, peeled and cut into wedges.
Olive oil
Oregano
Garlic salt or powder
Salt
Pepper

Throw the potato wedges onto a cookie sheet. Drizzle with oil. Top with seasonings and PLENTY of salt. Mix that around with your hands to make sure the potatoes are coated well. Spread out on the pan so none of the potatoes are overlapping. Pop into a 400F oven and bake approximately 15 minutes. Take out, flip the potatoes over and bake again for another 15 minutes, or until nice and browned.

Voila! Steak fries!! ;)

Collard Greens with Ham


They're not the prettiest food in the world, but they are delicious. :)

My husband works on the other side of the country, in West Virginia (We live in Utah), and he came home one day telling me he wanted to cook dinner. He made steak, fries and collard greens. The collard greens he served were canned greens. Now, there's nothing wrong with that, but c'mon... Homemade is always better. ;) I told him I'd make FRESH collard greens for him one day, and it may have been a mistake. Now it's a staple in our home. lol... Sometimes I make it with bacon, sometimes ham, whatever.

Here's what you'll need:

Collard greens (I buy 2 bunches)
Ham or bacon
olive oil or butter
onion
garlic
chicken stock
red pepper flakes
salt, pepper and seasonings to taste

First thing, remove the stems from the greens. You mostly just want the leafy part. If you fold them in half and pull on the leaves, the hard stem in the middle will usually just come right off. Chop the greens up into 2inch-ish squares and wash REALLY well.

Add oil to medium to large pot and saute the onion and ham, until onion is soft. If you're using bacon here, don't add oil. Cook the chopped bacon first and save a little oil for the onion, then proceed. Add the garlic and greens, and cook until the greens start to wilt. Pour in enough stock to just cover the wilted greens. Usually takes about 4 cups for me. Add the salt, pepper, red pepper flakes and seasonings. I use my usual "Tony's creole" seasoning.

Cover and simmer for 45 minutes to an hour, until the greens are tender. Add more salt and seasonings if needed.

Seriously, that's it.

Saturday, March 17, 2012

Creamy Salsa Dip and Baked Tortilla Chips


I was in the mood for some kind of snack, and I truly am obsessed with chips and dip. lol... Only problem, chips and dip are usually high in calories and fat. If you use the right tortillas for this you can make the entire snack (chips AND dip) for less than 100 calories a serving. :)

Things you'll need:

Tortillas
Salt
Cooking spray
Salsa
Light sour cream
Fat free Greek yogurt, plain
chili powder
cumin

You could use any tortillas for this recipe but I used 70 calorie whole wheat tortillas. Slice the tortillas anyway you like and spread on a cookie sheet that's been sprayed with cooking spray. Do a quick spritz over the pieces and sprinkle salt on them. Bake at 400 - 450 until they brown a little and get crispy.

And that's all there is to the tortilla chips. :P

For the salsa dip mix maybe 1/4 to 1/3 cup salsa with a tablespoon of plain fat free greek yogurt and 2 or 3 tablespoons of light sour cream. Add a little chili powder and cumin and stir it up. :)

Friday, March 16, 2012

Guilt-free Blondies!!


Who said dessert can't be healthy?! Of course, if you were to read the ingredients you'd probably question whether this was even a dessert at all! Of course it is, I wouldn't lie to you! :) Are they as sinfully sweet and delicious as REAL blondies? No. But at only around 100 calories a square I'd say they were pretty darn good. :) (more calories if you follow her recipe exact.)

I got this recipe from an awesome blog called Chocolate Covered Katie. It's full of healthy vegan snacks. :)

I used her recipe but made a few alterations to make it my own. :) I've posted her recipe, but in parenthesis wrote my exchanges.

Things you'll need:

1 can chickpeas or white beans, drained and rinsed (I used chickpeas)
3/4 tsp baking powder
1/8 tsp baking soda
heaping 1/8 tsp salt
3/4 cup brown sugar (I used 1/4 brown sugar and 1/2 C splenda)
1-2 tsp vanilla extract
1/4 cup ground flax
1/4 cup peanut butter, or other fat source (I used 1 Tbsp veg oil and enough unsweetened applesauce to make 1/4 cup. I didn't want peanut butter bars.)

optional: 1/3 cup chocolate chips (I used 24 guittard milk chocolate chips - melted)

Preheat oven to 350 degrees. Blend all ingredients (except chips) until very smooth in a food processor (not a blender).

Mix in chips, and scoop into a greased (or tinfoil-lined) 8×8 pan. (I melted my chips and spread them over the top after baking.)

Bake for 38-40 minutes. You want the blondies to look a little undercooked when you take them out, because they’ll firm up as they cool, and you don’t want them to get hard.

Tuesday, March 13, 2012

Baked Onion Rings

I looooove onion rings!! I was skeptical about baked onion rings at first, but wanted to find something yummy for my husband to have with his burger. These were PERFECT! I love them just as much, if not MORE than the greasy, fried rings I've become accustomed to. Plus, I didn't finish them feeling sick and guilty. :)


Things you'll need:

Onion (I used a large white onion)
egg whites
bread crumbs
seasoning

Preheat oven to 350-400F, depending on your oven. Mine runs hot, so I had mine on 350 convection.

Slice your onions and separate them into rings.

Mix the bread crumbs with seasoning of your choice. I used Tony's Creole Seasoning. If you've never had it I suggest you try it. I seriously use this for practically everything! lol... Steaks, burgers, chicken, fries, chips, etc.

Put the bread crumbs in a bowl, or on a plate.

Put egg whites in a bowl and beat them with a little bit of water.

Spray cookie sheet with cooking spray.

Dip onions in egg and then in crumbs and layer in a single layer on cookie sheet.

Bake for about 20 minutes, or until the onions are soft.

Oh, and btw. The ENTIRE dinner pictured here was less than 650 calories, and the majority of that was the burger. lol... :)

Baked Potato Chips with Onion Dip


Another comfort, chips and dip!! Can't live without them, but they're so loaded with oils, salt, creams, etc.

The potato chips recipe I sort of made up on my own, but the onion dip I found on the snack girl website which stated it came from the nutritionist from the Biggest Loser. :)

First, chips!

What you'll need:

Potato (red, russet, sweet, etc)
cooking spray, such as Pam
seasonings (my favorite so far being garlic salt and parmesan)

This is done easiest with a mandolin, so you can get thin slices and slice them evenly.

Preheat your oven to 350 - 400F. I had mine set to 350 convection.

You want to slice your potato, peels on or off - your choice. Slice thin. No thicker than 1/8 inch.

Pat them dry with a paper towel.

Spray a cookie sheet with cooking spray and layer the potato slices on it. Sprinkle with seasonings and put in oven. Bake for approximately 10 minutes, then rotate your pan and bake another 10 minutes. You'll want to watch them closely the first few times you make them, to get the right baking to suit your oven. It took me at least 5 trials to get them where I like them. :)

That's it. Let them cool and you have chips! My husband says he likes them more than Lay's. ;)

I don't have the nutritional info for these, sorry.

Okay, now the onion dip. This one is a bit time consuming but it makes quite a bit.

Click here for the onion dip recipe on the snack girl site.

Things you'll need:

2 1/2 pounds yellow onions, peeled
1 tablespoon olive oil
1 teaspoon salt
1 tablespoon onion powder
4 ounces neufchatel cream cheese, room temperature
3/4 cup fat-free plain Greek yogurt
Flat-leaf (Italian) parsley leaves, for garnish (optional)

Halve the onions lengthwise and then slice them crosswise into 1/8-inch-thick half-rounds. There will be about 4 cups.

In a large skillet, heat the oil over medium heat. Add the onions and salt and cook for 2 to 3 minutes. Reduce the heat to low, cover, and cook, stirring occasionally, for 15 minutes, or until the onions are soft and beginning to release their juices. Continue to simmer uncovered, stirring occasionally, for 15 to 20 minutes longer, or until the onions are lightly browned and caramelized. Allow to cool. There will be about 2 cups.

Place the onions in a food processor and pulse a few times to chop. Remove half of the onions and transfer them to a bowl. To the remaining onions in the food processor, add the onion powder and process until pureed. Add the cream cheese and yogurt and process just until smooth. Transfer the mixture to the bowl and fold into the chopped onions.

Taste and season as needed. Chill for at least 1 hour. Transfer the dip to a serving bowl and garnish with parsley leaves, if desired.

Per 1/4 cup serving: 80 calories, 3 g total fat (1 g saturated), 5 mg cholesterol, 230 mg sodium, 11 g total carbohydrates (5 g sugars), 1 g fiber, 3 g protein, 2 PointsPlus

Portabella Pizza

Okay, so in my new adventure on trying to become healthier I've decided to challenge myself to make healthy alternatives to normal comfort foods. First one: Pizza!!


Now, I believe that the unhealthiest part of a pizza is the crust. With this, there is no bread crust but rather a portabella mushroom cap turned upside down. This was more filling than I expected. I had this for lunch along with a protein shake. :)

I actually made this recipe from an idea I found online.

Things you'll need:

Portabella mushroom caps
1 can dice tomatoes
1 can tomato sauce
mozzarella cheese, grated (1/4 cup per pizza)
salt
truvia (or sugar, if you would rather)
italian seasoning
oregano

First, make your sauce. In a sauce pan add the tomatoes and tomato sauce. Add the salt, truvia, and seasonings to taste. Let it simmer until it reduces by half and thickens.

Wipe caps with a paper towel. Remove stems. Add the sauce and cheese and bake at around 350 for 20 minutes. Seriously, that's it! And totally satisfied that "pizza" craving I was having. ;)

Friday, December 30, 2011

Risengrød (Rice Porridge)


Whether you call it Risengrød, Risgrynsgröt or Risgrøt, it's all the same thing. Rice Porridge. :)

A Scandinavian Christmas Eve tradition, risengrød has quickly become one of my favorite comfort foods. I'm eating a bowl of it right now, as a matter of fact. ;)

I found this recipe on an about.com article.

What you'll need:

1 1/2 C water
1 Tbsp butter
1/2 tsp salt
1 C rice (I used calrose, because it's my fave and I always have on hand)
4 1/2 C milk (I used 2%)
Cinnamon, sugar and butter to taste

Rinse rice well and drain.

In a heavy-bottomed saucepan, bring water, butter, and salt to a rapid boil over high heat.


Pour in rice, stirring constantly to prevent sticking.


Reduce heat to low, stirring rice until boiling is reduced to a simmer. Cover pot and simmer for 10 to 15 minutes, until rice has absorbed most of the water.


Personally, I think the rice is delicious just like this. :) But it's definitely not porridge yet.

Add milk to rice, stirring to incorporate.


Bring mixture to a boil, stirring constantly, then immediately reduce heat to low. Once boiling has reduced to a simmer, cover pot and allow to cook for 45 minutes. (Some say to stir occasionally, others say not to touch it the whole 45 minutes. I stirred occasionally.)


I should have cooked it just a bit longer, because this just wasn't quite thick enough for my liking... But, what do ya do?

Top with a little butter and cinnamon/sugar to taste. :)

For a quick riskrem, mix cold risengrød with some sweetened and whipped cream. Drizzle some raspberry sauce over the top!

Monday, October 17, 2011

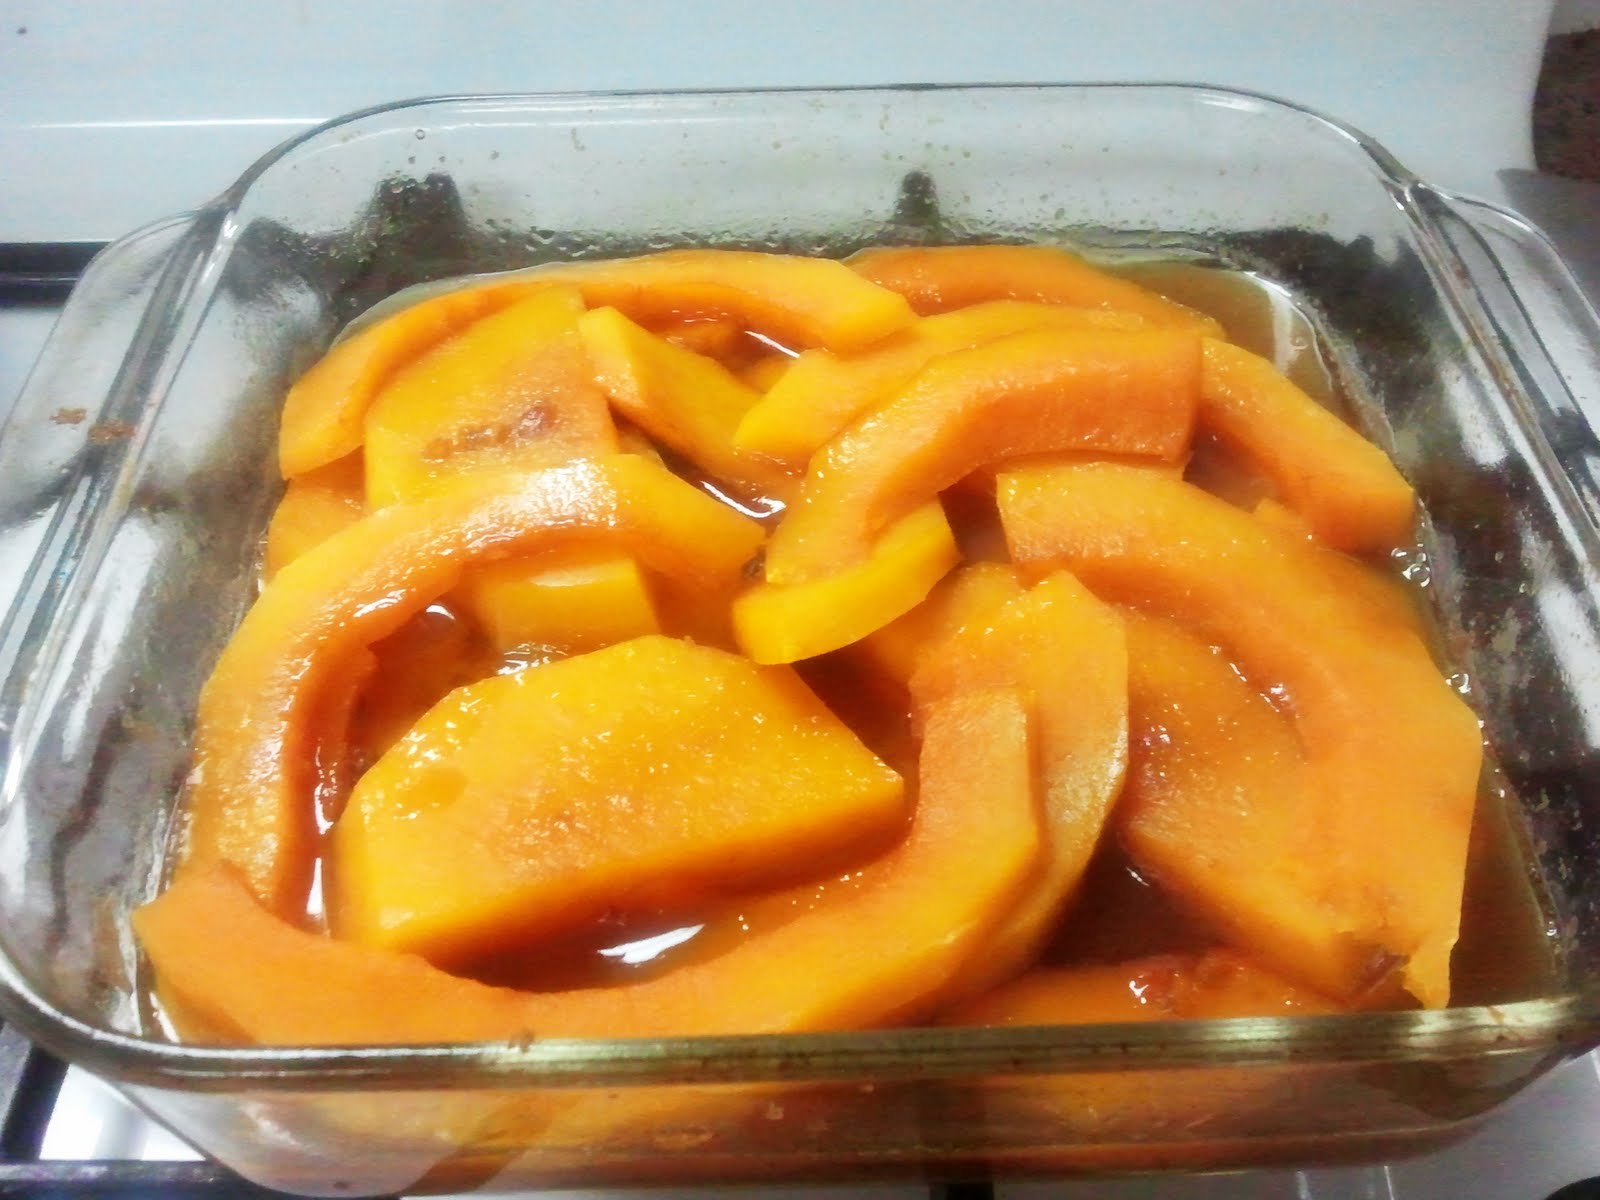
Oven Roasted Butternut Squash


So, this is something I threw together tonight, to use up the leftover squash from the Dinner in a Pumpkin in my last post. This recipe would also work great with yams.

What you'll need:

Butternut squash
butter
brown sugar

You could add some cinnamon, if you'd like. :)

Also, this recipe could be altered to make more of a savory dish, rather than sweet. You could use some garlic, parmesan, salt and pepper in place of the brown sugar. Yum! :)

Preheat oven to 350°F.

Spray a baking dish with non stick spray.

Peel and slice the squash. I sliced about 1/2 inch thick. Be sure you've removed the "guts" and seeds. Then make a layer in baking dish. Sprinkle with brown sugar and diced butter.


Make another layer of squash, brown sugar and butter.


Cover with aluminum foil and pop into the oven.

Bake for 45 minutes, or so (Yeah, that's a technical term), until the squash is cook. A fork should slide through it easily.


I actually wish I would have baked it half of the time with the cover off, to brown the top just a bit.

When you dish it up, be sure to drizzle some of that delicious sauce over the top.

That's it. Pretty simple, eh? :)

Sunday, October 9, 2011

Garlic Smashed Potatoes


Okay, I don't have step by step pictures for this one this time. I was halfway through it before I thought about it. lol... I also don't have exact measurements. It's sort of one of those "throw it together until it tastes good" kind of foods. :)

Things you'll need:

Red potatoes
Garlic
Sour Cream
Milk or cream
Butter
Salt
Pepper
Italian Parsley (optional)

Cut your potatoes into cubes, with the skins on. Peel a clove or two (or three or four) of garlic. Depending on how many potatoes you're cooking, and how garlicky you want it. :P Give them a good "whack" to smash them and throw them in a pot with the potatoes. Add salt and add enough water to cover the potatoes.

Boil until soft - until a fork slides through easily.

Drain. Put back in pot.

Throw in a pat or two of butter, a scoop or two of sour cream, a splash of milk, salt and pepper to taste. Smash it up.

Taste.

Do you like it?

No?

Add what you think it needs...

Like it now?

Good. :)

Now, chop up some parsley and stir it into the mix...

There you have it... Garlic smashed potatoes.

Thursday, October 6, 2011

White Bread


It's a stormy day today, so I decided I would bake some bread. I love baking during stormy weather. :) It's comforting. I figured that I didn't need to bake cookies or cakes since I'm the only one home, and my hips seriously don't need the calories... Bread seemed sorta safe... Emphasis on the "sorta". ;)

This is the first time I've attempted homemade bread without the use of a bread machine in quite a few years. It just never works out for me. I've always used my grandmother's recipe, but I just can't get it to turn out. It is the same recipe that my mom and dad have used for years, and they make it perfectly. I'm not sure what I'm doing wrong. lol...

This is a recipe that I found on allrecipes.com. It was titled Amish White Bread. The recipe is supposed to make 2 loaves, but I halved it to only make one.

What you'll need (for two loaves):

2 cups warm water (110 degrees F/45 degrees C)
2/3 cup white sugar (That seemed like alot, so I halved it)
1 1/2 tablespoons active dry yeast
1 1/2 teaspoons salt
1/4 cup vegetable oil
6 cups bread flour

Like I said, I halved the above recipe.

In a large bowl, dissolve the sugar in warm water, and then stir in yeast.


This is where I realized I picked the most unappetizing color of bowl that I had in my kitchen. Sorry about that.

Allow to proof until yeast resembles a creamy foam. See it puffing up, or "blooming"? You want that.


Mix salt and oil into the yeast.

This is where my mom would panic a little. She always told me to be careful with salt, because too much salt can ruin the yeast reaction.

I thought for a minute, held my breath and threw it in anyway. ;)


Mix in flour one cup at a time.


Knead dough on a lightly floured surface until smooth. I kneaded for about 5 or so minutes. It probably could have used more, but I'm not that patient.


Place in a well oiled bowl, and turn dough to coat. (Yeah... I used "Pam".)


Cover with a damp cloth. Allow to rise until doubled in bulk, about 1 hour.

After the salt scare I was a little nervous when it was time to check.


It worked!!

Punch dough down. Knead for a few minutes, and divide in half. Shape into loaves, and place into two well oiled 9x5 inch loaf pans.

I used shortening and flour in my pan. Butter would have tasted better, but I didn't have any softened.


Allow to rise for 30 minutes, or until dough has risen 1 inch above pans.

I checked after 30 minutes, and it was NOT 1 inch above the pan. So, I gave it 15 more minutes.


It still didn't raise that high, but as I said I'm impatient, so I popped it in the oven anyway.

Bake at 350 degrees F (175 degrees C) for 30 minutes.

While it baked, I made some butter to go with it.


Success!

Take it out of the pan and set it on the a cooling rack to cool for a bit.


Or if you have patience like I do, slice it up, slap some homemade butter on and enjoy it warm. :)


It's not my grandma's bread, but at least it was a loaf I was able to bake successfully. :P Yay me!